[Raspberry Pi]Build OpenCV 4 on Raspberry Pi With Multiple Languages(C++&Python2,3) (2019/9/20 Updated)
[Preface]
When I was a high school student, the first gen Raspberry Pi was published,
which is a totally new product at that time. I was lucky to meet a visionary
teacher who led us to play with this powerful micro-computer for about a
year.
Still remember that we participated a science fair, and we used a Raspberry Pi
to control a LED matrix as a project topic. For sure, this was not a huge
project or an amazing idea in that fair. But those evaluation committees
seemed like so disdainful about our project, said "I can use a simply
single-processor like 8051 to do the same thing." After a few years, I am
going to graduate from university, and all the world are crazy about IoT, etc.
Really want to know how do those committees feel right now.
Raspberry Pi has so many advantages. As a developed board, it is really
successful. And now, the third gen has been published, with a greatly
performance improvement (although still not very fast). This
makes it can do more executions. So, this time, let's install OpenCV on it!
- A working Raspberry Pi (referred to as Pi) with SSH access and internet
- A computer.
Please refer other articles to install/set up the Pi before install
OpenCV.
[Step by Step]
Refer to this article (pyimagesearch) and fix some libs that should be installed. (marked with yellow) If you need to use Python virtual environment, you should chick the link and follow the instructions. well... I always install OpenCV into the base environment, so I didn't install it
-2019/9/19
Update Pi
$ sudo apt-get update
$ sudo apt-get upgrade
Install some packages to improve efficiency
$ sudo apt-get install htop // Enhanced top
// has installed in new OS
$ sudo apt-get install tightvncserver
//VNC server
Install dependencies
$ sudo apt-get install build-essential
$ sudo apt-get install cmake git libgtk2.0-dev pkg-config
$ sudo apt-get install libavcodec-dev libavformat-dev libswscale-dev
$ sudo apt-get install libgtk-3-dev // new
More dependencies..
$ sudo apt-get install libjpeg-dev libtiff5-dev libjasper-dev libpng12-dev
$ sudo apt-get install libavcodec-dev libavformat-dev libswscale-dev libv4l-dev
$ sudo apt-get install libxvidcore-dev libx264-dev
$ sudo apt-get install libgdk-pixbuf2.0-dev libpango1.0-dev //new
$ sudo apt-get install libatlas-base-dev gfortran
$ sudo apt-get install python-dev python3-dev  // python

$ pip install numpy
$ pip3 install numpy
//numpy should be installed via pip
Clone OpenCV & OpenCV Contrib
$ git clone https://github.com/opencv/opencv.git
$ cd opencv
$ git checkout 4.1.1
$ git clone https://github.com/opencv/opencv_contrib.git
$ cd opencv_contrib
$ git checkout 4.1.1
//can change the locationConfigure OpenCV CMake
//into opencv folder and create build folder
$ cd opencv
$ mkdir build
$ cd build
//cmake parameters, can be in/decreased by yourself
$ cmake -D CMAKE_BUILD_TYPE=Release \
-D CMAKE_INSTALL_PREFIX=/usr/local \
-D OPENCV_EXTRA_MODULES_PATH=~/opencv_contrib/modules \
-D BUILD_opencv_python2=ON \
-D BUILD_opencv_python3=ON \
-D INSTALL_PYTHON_EXAMPLES=OFF \
-D INSTALL_C_EXAMPLES=OFF \
-D BUILD_EXAMPLES=OFF \
-D ENABLE_NEON=ON \
-D ENABLE_VFPV3=ON \
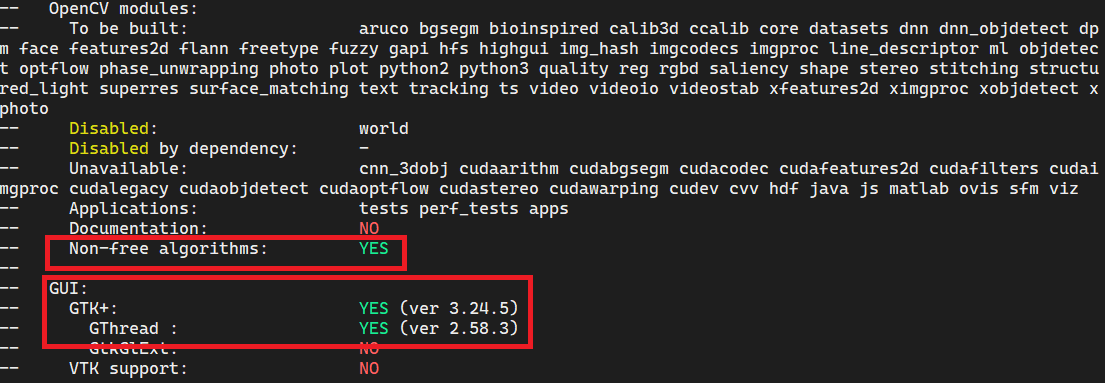
-D OPENCV_ENABLE_NONFREE=ON \
-D CMAKE_SHARED_LINKER_FLAGS=-latomic \
-D OPENCV_GENERATE_PKGCONFIG=YES ..
//every parameter should be easy to understand..
//OPENCV_EXTRA_MODULES_PATH have to locate to the opencv_contrib folder, attention!
//add five flags/parametersThe execution time of CMake is about 5 minutes. If all the setting and configuration is correct, you can see the sentence like configured successfully/done and generated successfully/done.
These are some points that I want to mention especially.
1. Check the OPENCV_EXTRA_MODULES_PATH is correct and the version is as
same as OpenCV.

2. Check the path of Python2, 3, and others. Basically, all these packages
should have the path and that will be ok. You don't have to check all the
package.


Then we can move forward to next step!
Compile OpenCV
$ make -j4  //-j4 means using multi-processor, might need to modify swap memory[*1]
//it might takes a while, go to get a coffee!
$ sudo make install
$ sudo ldconfig
//If you need C++ environment, jump to [*2]
Done!
Next, let's check if the OpenCV has been installed correctly or not.
$ pkg-config --modversion opencv
> 3.3.0
//will retune OpenCV version if correctly installPython2 check
$ python
import cv2
cv2.__version__
>>> 3.3.0
Python3 check
$ python3
import cv2
cv2.__version__
>>> 3.3.0[Reference]
[Update]
Many people have reported that it will be wrong if they follow the article.
So, just recently, the new Pi 4 was launched and I also bought one. I will
update the instruction of the article using OpenCV 4.1.1 w/ Raspberry Pi 4
and add some reviews or recommendations.
-2019/9/19
[*1]
If you have some troubles with make -j4 that said memory is not enough.
You can do these two solution:
- Using make instead of make -j4
- Modify the swap virtual memory
sudo nano /etc/dphys-swapfile
//find this line and edit SWAPSIZE from 100 to 1024
# CONF_SWAPSIZE=100
CONF_SWAPSIZE=1024
//ctrl+x, y, enter to quit nano editor
//restart SWAP
$ sudo /etc/init.d/dphys-swapfile stop
$ sudo /etc/init.d/dphys-swapfile start
//after that, using htop to see if the edit is correct or not. The top swp should be 1G[*2]
Found a article (cv-tricks) on the internet to solve the problem. Although it is for Ubuntu, but
after I follow the instructions, the C++ environment is working. The
following command should be done after make.
//install lib
$ sudo make install
$ sudo sh -c 'echo "/usr/local/lib" >> /etc/ld.so.conf.d/opencv.conf'
$ sudo ldconfig
//edit opencv4.pc, add "2" after the line includedir_old
$ sudo nano ~/opencv/build/build/unix-install/opencv4.pc
//includedir_old=${prefix}/include/opencv4/opencv (OLD)
$ includedir_old=${prefix}/include/opencv4/opencv2
//ctrl+x, y, enter to quit nano editor//re-link
$ cd /usr/local/lib/
$ mkdir pkgconfig
$ sudo cp ~/opencv/build/unix-install/opencv4.pc /usr/local/lib/pkgconfig///update environment variable PKG_CONFIG_PATH
$ sudo nano ~/.bashrc
//add these two lines after this file
PKG_CONFIG_PATH=$PKG_CONFIG_PATH:/usr/local/lib/pkgconfig
export PKG_CONFIG_PATH
//ctrl+x, y, enter to quit nano editor//re-read
$ source ~/.bashrc$ g++ -std=c++11 HelloWorld.cpp `pkg-config --libs --cflags opencv4` -o result

Comments
Post a Comment